Draw Your Own Floor Plan: A Comprehensive Guide
Creating a floor plan is a crucial step in any architectural or interior design project. Whether planning a home renovation, designing a new building, or simply rearranging existing furniture, a well-executed floor plan serves as a visual blueprint for the space. While professional architects and designers often utilize specialized software and techniques, individuals can also create their own floor plans using various methods, ranging from simple hand-drawn sketches to sophisticated digital tools. This article provides a comprehensive guide to drawing your own floor plan, outlining key considerations, techniques, and resources to help achieve accurate and useful results.
The purpose of a floor plan extends beyond mere aesthetics; it is a functional document that communicates spatial relationships, dimensions, and the placement of key elements like walls, doors, windows, and fixtures. A thoughtfully designed floor plan can optimize traffic flow, maximize usable space, and ensure that furniture and equipment fit comfortably within the designated areas. Furthermore, a floor plan serves as a critical communication tool between homeowners, contractors, and other stakeholders involved in a construction or renovation project. Accurate and detailed floor plans minimize misunderstandings and ensure that the intended design is executed correctly.
Understanding the Basics of Floor Plan Design
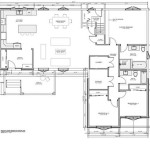
Before embarking on the process of drawing a floor plan, it is essential to grasp fundamental concepts related to architectural drafting and spatial representation. A floor plan is a two-dimensional depiction of a space viewed from above, typically showing the arrangement of walls, doors, windows, and other permanent fixtures. It is important to understand the standard conventions used in floor plan drawings, such as line weights, symbols, and scales. Line weight, for instance, differentiates between walls, which are typically represented with thicker lines, and other elements like furniture, which are drawn with thinner ones. Standard symbols represent various features like doors (often shown as an arc indicating the swing direction), windows (depicted as parallel lines), and plumbing fixtures (represented with specific icons). Adherence to these conventions ensures that the floor plan is easily understood and interpreted by anyone familiar with architectural drawings.
Scale is another critical aspect of floor plan design. It represents the ratio between the dimensions on the drawing and the actual dimensions of the space. Commonly used scales include 1/4 inch = 1 foot or 1/8 inch = 1 foot. Selecting an appropriate scale depends on the size of the space being represented and the level of detail required. For smaller spaces, a larger scale (e.g., 1/2 inch = 1 foot) may be suitable, allowing for more precise representation of fixtures and furniture. For larger spaces, a smaller scale (e.g., 1/16 inch = 1 foot) may be necessary to fit the entire plan onto a manageable sheet of paper or digital screen.
Accurate measurements are paramount to creating a useful floor plan. Before drawing, it is crucial to measure the existing space accurately. This involves measuring the length and width of each room, the height of ceilings, the dimensions of windows and doors, and the locations of fixed elements like plumbing fixtures and electrical outlets. Using a laser measuring tool or a long measuring tape is recommended for obtaining precise measurements. Double-checking measurements is also advised to minimize errors. When measuring, it's also important to note the thickness of walls as this will impact the overall dimensions of the rooms.
Methods for Drawing Your Own Floor Plan
There are several methods for creating a floor plan, each with its own advantages and disadvantages. The most basic method is hand-drawing, which involves using paper, pencil, and a ruler or architect's scale. Hand-drawing is a low-cost and accessible option, particularly useful for initial sketches and brainstorming. However, it can be time-consuming and prone to errors, especially when dealing with complex spaces. Moreover, revisions can be cumbersome, requiring the re-drawing of entire sections of the plan.
Another option is to use drafting software, also known as Computer-Aided Design (CAD) software. CAD programs like AutoCAD, SketchUp, and Revit offer precise drawing tools, automated measurement features, and the ability to create 3D models from 2D floor plans. While CAD software requires a learning curve, it provides unparalleled accuracy and flexibility. It allows for easy revisions, detailed annotations, and the ability to share and collaborate on the plan digitally. However, CAD software can be expensive, and requires a computer with sufficient processing power.
A third option involves using simplified floor plan software or online tools. These tools offer user-friendly interfaces, drag-and-drop functionality, and pre-designed symbols and templates, making them accessible to users with limited drafting experience. Examples include RoomSketcher, Floorplanner, and Planner 5D. These tools often offer free basic versions, with more advanced features available through paid subscriptions. While they may not offer the same level of precision as CAD software, they provide a convenient and efficient way to create professional-looking floor plans.
When choosing a method, consider the complexity of the project, the level of accuracy required, and the available resources. For simple renovations or rearranging furniture, hand-drawing or a simplified floor plan tool may suffice. For complex architectural designs or construction projects, CAD software is generally the preferred option.
Key Considerations and Best Practices
Regardless of the method chosen, several key considerations and best practices apply to creating an effective floor plan. The first is to consider the intended use of each space. A floor plan should reflect the functional requirements of the occupants, taking into account factors like traffic flow, furniture arrangement, and accessibility. For example, a kitchen floor plan should prioritize efficient workflow between the sink, stove, and refrigerator, while a living room floor plan should provide ample seating and space for entertainment.
Another important consideration is the placement of doors and windows. Doors should be positioned to minimize obstructions and maximize usable wall space. Windows should be strategically placed to optimize natural light and ventilation. Consider the orientation of the building and the position of the sun when determining window placement. The placement of electrical outlets and light fixtures should also be carefully planned to ensure that they are conveniently located and meet the needs of the occupants.
Accessibility is a critical factor in floor plan design, particularly when designing for individuals with disabilities or limited mobility. The floor plan should comply with accessibility guidelines, such as those outlined in the Americans with Disabilities Act (ADA). This includes ensuring that doorways are wide enough to accommodate wheelchairs, that hallways are clear and unobstructed, and that bathrooms and kitchens are designed with accessible features.
Finally, it is essential to review and revise the floor plan multiple times before finalizing it. Show the plan to others and solicit feedback. Make sure that all measurements are accurate, that the layout is functional, and that the design meets the needs of the occupants. Consider creating a 3D model of the floor plan to visualize the space from different perspectives. This can help identify potential problems or areas for improvement before construction begins.
Using a floor plan template can be helpful, especially for those new to floor plan creation. Many online resources offer free or low-cost templates that can be customized to fit specific needs. These templates often include pre-drawn symbols and guidelines, saving time and effort.
Consider the future. Think about how the space might be used in the future and design the floor plan to be flexible and adaptable. For example, consider including extra electrical outlets or designing rooms that can be easily converted to different uses. Planning for potential future changes can save time and money in the long run.
Pay attention to details. Small details can make a big difference in the overall functionality and aesthetics of a floor plan. For example, consider the swing direction of doors to ensure that they don't block walkways or furniture. Pay attention to the placement of lighting fixtures to ensure that the space is well-lit. Think about the flow of traffic through the space and design the layout to minimize congestion.
By understanding the fundamentals of floor plan design, choosing the appropriate method, and adhering to best practices, individuals can create their own accurate and useful floor plans. This empowers them to effectively communicate their vision, optimize the use of space, and ultimately create a functional and aesthetically pleasing environment.

Make Your Own Blueprint How To Draw Floor Plans

Make Your Own Floor Plans

Floor Plan Creator And Designer Free Easy App

Make Your Own Blueprint How To Draw Floor Plans Drawing House Sketch Plan

House Plans How To Design Your Home Plan

Draw Floor Plans With The Roomsketcher App

Be Your Own Floorplanner How To Draw House Plans Drawing Building A

Floor Plan Creator And Designer Free Easy App

Draw Floor Plans With The Roomsketcher App

Draw Floor Plans With The Roomsketcher App