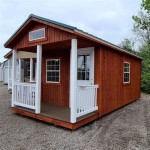
24x30 Pole Barn Plans Free
A 24x30 pole barn is a versatile structure that can be used for a variety of purposes, such as storage, workshops, or even living spaces. Building a pole barn is a great way to save money and get exactly the space you need. With a little planning and effort, you can build a 24x30 pole barn that will last for years to come.
Materials List
The following is a list of materials you will need to build a 24x30 pole barn:
- 24 treated 6x6 posts (10' long)
- 30 2x6 skids (12' long)
- 24 2x6 girts (10' long)
- 96 2x4 studs (8' long)
- 12 sheets of 3/4" plywood (4'x8')
- 2 rolls of roofing felt (30'x40')
- 2 bundles of 3-tab shingles (33 sq. ft. per bundle)
- 1 box of 16d nails
- 1 box of 8d nails
- Concrete
Tools
You will also need the following tools to build a 24x30 pole barn:
- Post hole digger
- Skid loader or tractor
- Circular saw
- Nail gun
- Hammer
- Level
- Tape measure
- Chalk line
Instructions
Follow these steps to build a 24x30 pole barn:
- Prepare the site. Clear the area where you want to build the pole barn of all vegetation and debris. Level the ground and mark the location of the posts.
- Dig the post holes. Dig 4' deep post holes at each of the marked locations.
- Set the posts. Place a post in each hole and backfill with concrete. Tamp the concrete down around the posts to secure them in place.
- Install the skids. Place a skid on top of each of the posts. Secure the skids to the posts with 16d nails.
- Install the girts. Place a girt on top of each of the skids. Secure the girts to the skids with 16d nails.
- Install the studs. Place a stud between each of the girts. Secure the studs to the girts with 8d nails.
- Install the plywood. Place a sheet of plywood on top of the studs. Secure the plywood to the studs with 8d nails.
- Install the roofing felt. Roll out a layer of roofing felt over the plywood. Secure the roofing felt to the plywood with roofing nails.
- Install the shingles. Install the shingles over the roofing felt according to the manufacturer's instructions.
- Trim the barn. Install fascia boards, soffit panels, and any other trim desired.
Conclusion
Building a 24x30 pole barn is a great way to save money and get exactly the space you need. With a little planning and effort, you can build a pole barn that will last for years to come.

Affordable Steel Building Kits Delivered Installed

Affordable Steel Building Kits Delivered Installed

Custom Pole Barn Building Photo Gallery Ohio Pennsylvania

Affordable Steel Building Kits Delivered Installed

Affordable Steel Building Kits Delivered Installed

Custom Pole Barn Building Photo Gallery Ohio Pennsylvania

Custom Pole Barn Building Photo Gallery Ohio Pennsylvania

Custom Pole Barn Building Photo Gallery Ohio Pennsylvania

Affordable Steel Building Kits Delivered Installed

Affordable Steel Building Kits Delivered Installed